Olympus 40-150 f2.8 Pro Lens Field Review Bird Portraits
In November 2014 I conducted a basic Olympus 40-150 f2.8 pro lens field review at the British Wildlife Centre in Surrey. The purpose of initial field testing is to see how a lens performs in a variety of situations and at certain settings (most notably wide-open and at the extremes of the zoom range). I look at things like relative softness/sharpness, and how this might change across the frame. I’ll also be examining flare, fringing, contrast and colour. When we pay a premium price for a high-grade lens we expect fairly consistent performance and I have to say this particular optic scores very highly. I find it to be extremely sharp across-the-board with a natural colour and contrast signature. This is quite important since lenses do have their own individual characters.
OLYMPUS 40-150 F2.8 LENS FOR WILDLIFE PHOTOGRAPHY
I decided to use the Olympus 40-150 f2.8 Pro lens pretty much as I would on any animal or pet portraiture outing. On this occasion I had a number of lovely and very willing birds as subjects. Mounted on the EM1 this is a formidable combination for wildlife photography. It balances very well on the camera, despite its size and relative weight. I had a battery grip on my EM1 which gives a bit of extra stability, but is by no means a requirement.
Before now I’ve been relying quite well on lenses such as the Panasonic 100-300 and the Olympus 40-150R. Both of these are variable aperture lenses which helps to keep the size, weight, and pricetag to a minimum. They are both optically very good indeed (the little Olympus beating the Pana) but as you can imagine they are quite slow as you progress through the zoom range. The widest available aperture then becoming f5.6 which can be limiting in low light and also somewhat limiting if you specifically require shallow depth of field. Obviously I claw back two stops of light with the new Olympus 40-150 f2.8 pro lens which vastly broadens my shooting window. This means I can shoot with two stops lower ISO as well, effectively gaining the same kind of photographs I’ve been accustomed to taking when using my Canon full frame pro kit (where I would be shooting my 70-300L at F5.6 in order to gain enough depth of field for my subjects, whilst also seeing pleasing background separation).
Note that if you currently use a crop sensor DSLR you’ll barely notice a difference (if any) in overall image quality or depth of field should you switch to micro four thirds. This is because the depth of field differential between these formats is only about two thirds of a stop. If you want to you can shoot a stop or thereabouts wider when using your m4/3 gear and consequently gain an image which is also a stop cleaner with regard to noise (the latest Micro 4/3 sensors are as good as, or in some instances a little better than most of the latest crop DSLR offerings). So for the crop DSLR users out there, there can be distinct advantages to downscaling (providing you choose a system which gives you the other performance attributes you require).
As I mentioned, if you’re a full frame user the depth of Field differential is about two stops, so if you want “the same” photographs you need to shoot your Micro 4/3 camera a couple of stops wider on the aperture. This will save you two stops of noise bringing your Micro 4/3 output in line with full frame (notwithstanding any megapixel differences). That said, if you’re shooting your full frame kit using fast primes wide-open (good luck to you if you fall into this category) then that option won’t be available.
Anyway, back to the birds. I’m shooting the Olympus 40-150 f2.8 pro lens wide open since this is of particular interest to many of the photographers who might decide to purchase it. It’s wonderfully sharp so there is no particular need to stop down unless your scene or subject requires it.
Today’s Tip:
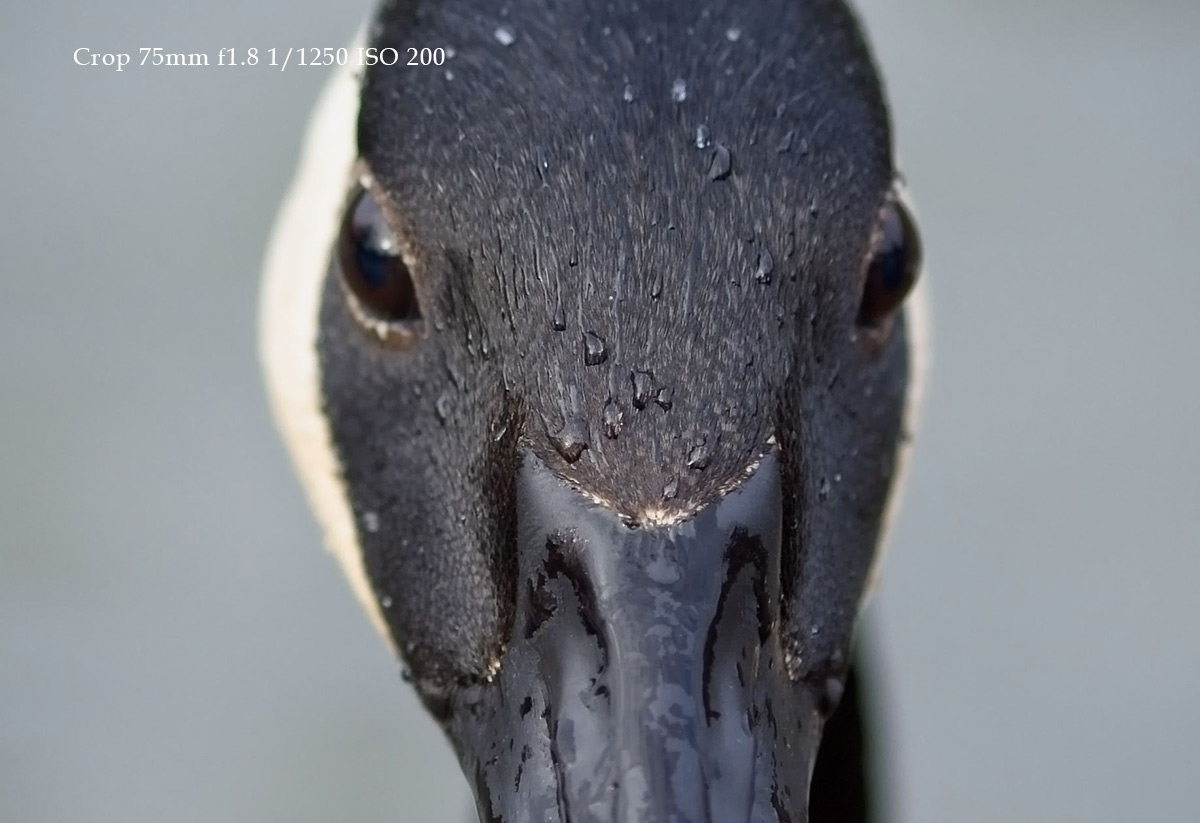
As you zoom in or move closer to your subject remember that the depth of field will become shallower, so you do need to pay attention to your focus point. Where portraits are concerned this will generally be the eye nearest to the camera. You may need to focus, focus lock, and recompose in order to gain the composition you want. Or if time allows, you can manually select your focus point.
The RAW files have undergone my usual processing in Lightroom where I apply a curve adjustment to give the photographs a little more life. These shots were taken at around ISO 800. On input minimal sharpening has been applied at 0.3/30.
There is a x1.4 teleconverter to match the new lens – I didn’t use it on this occasion simply because the birds were close enough already.
I’ve thrown in a shot taken with the wonderful Olympus 75mm f1.8, so you can compare sharpness wide open. My main review of the lens is here: Olympus 40-150 f2.8 Pro Lens Field Review Wildlife